How To Mend Your Clothes: Easy Fixes To Maintain Your Wardrobe
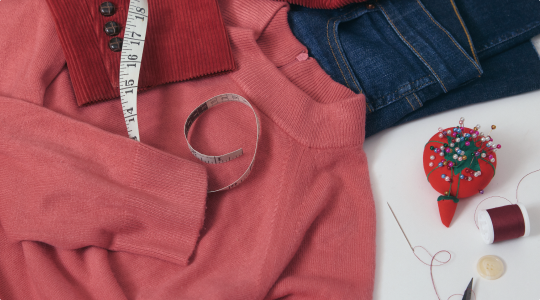
Repairing clothing is one of our favorite eco-friendly fashion habits (alongside thrifting and choosing sustainable clothing brands). Quick fixes, like sewing buttons and stitching hems, keep your favorite pieces looking fresh, saving on shopping costs and reducing your fashion footprint.
Discover how to mend your clothes with five easy techniques and extend the life of your wardrobe.
Essential supplies for mending clothes
You don’t need many tools to learn how to mend clothing. Grab some essentials, and you’ll be ready for any simple repair job. Here are the basics to get started:
- Thread: Buy different types and colors of thread to match various garments in your wardrobe. Regular and embroidery thread in neutral colors, like black, white, and tan, will cover most of your needs.
- Needles: Start with a small pack of ordinary and embroidery needles so you can use both thin and thick thread. Grab a tapestry needle, too, if you’re going to darn knitwear.
- Sewing pins: Also called dressmaker’s pins, these are incredibly helpful for holding patches in place and securing tears as you stitch.
- Scraps and patches: You can find patches at craft stores or cut up worn, damaged clothing to upcycle it into fabric scraps. Keep various colors and materials around to match them to different garments.
- Small extras: We recommend grabbing a pair of fabric scissors, a needle threader, and a darning egg or mushroom. While these items aren’t essential, they’re practical to have around if you want to mend clothes regularly.
After you assemble these tools, you can tackle most repairs. A lot of clothing maintenance doesn’t need any tools, like shrinking an oversized shirt or detoxing your clothes.
Pro tip: Keep the repair of clothing as simple as possible by creating a mending box. Put your essentials in a small food storage container for an easy, upcycled solution.
How to repair clothing: 5 different types and techniques
Don’t part with the perfect jeans because of a rip or missing button. Learn how to mend clothes by hand with these tips—but feel free to break out the sewing machine if you have one.
1. Sew a button
Materials: Needle, thread, and a button.
While it looks complex, it only takes a few minutes to learn and complete this essential trick. We’ll walk you through a standard two-hole button, but a four-hole uses the same process.
Here’s a quick step-by-step:
- Thread your needle and knot the end of the thread. Place the button on the garment (whether the original or a similar replacement button).
- Push the needle through the back of the fabric and through one of the button holes, and then over the center and through the other hole, back through the fabric. Repeat this five to eight times—opt for more stitches for thicker fabric.
- End with your needle on the back of the button. Secure the stitch by tying a small knot.
For a four-hole button, simply go between all holes equally, creating an “X” with your thread.
Pro tip: When sewing extra thick clothing, like wool coats, use embroidery thread or a double thickness of regular thread to reinforce the stitch.
2. Mend hems
Materials: Needle and thread.
A ripped hem ruins the look of your favorite blouse—on top of that, it can compromise the structure, and the garment may start to unravel. Here’s a quick way to mend those stitches and save the piece:
- Thread and knot an ordinary needle. Turn the garment inside out and position it on a flat surface. Note: Hems aren’t always on the inside, so keep your clothing right side out if the hem is outwards-facing.
- Push your needle through the bottom of the hem and hide the knot inside (this part will fold up, so the knot won’t be seen later).
- Use a whipstitch to secure the hem in place: catch a few threads of the garment without going through the fabric, go down to the hem where you catch a few threads, and continue in this fashion. Tie off your thread.
Pro tip: If you’re hand-sewing, use a whipstitch, blanket stitch, or catch stitch. If you have a sewing machine, use a blind or turned hem stitch.
3. Stitch a strap
Materials: Needle and thread.
We love spaghetti dresses, but those tiny straps are too easy to break. Don’t give up on one of your closet staples—learn this go-to mending tip in three steps:
- Break out your embroidery needle and thread and knot the end. Hide the knot in the item’s lining if it’s exposed—if not, just hide the knot in the inside of the garment.
- Weave your needle up and down through the clothes into the end of the strap until the weave is the same thickness as the strap.
- Push the needle through horizontally a few times to reinforce the weave. Go back and forth between vertical and horizontal to create a tight hold. Tie off your thread.
This method also works on straps that end in a plastic or metal circle. Just sew up and around the hard loop instead of through the garment.
Pro tip: Is the strap too worn and frayed to be sewn? Thrift a new dress and upcycle your old one into a new skirt.
4. Darn knitwear
Materials: Thread, needle, and darning mushroom (or a light bulb or rubber ball).
A hole in your knitwear is devastating. It ruins a beautiful piece and lets in a draft, and it’s intimidating to mend. While it’s slightly more complex than other jobs, darning sweaters and socks isn’t too tough. Here’s how to do it:
- Thread yarn or embroidery thread through your needle and knot it. Place a darning mushroom (or one of our alternatives) into the garment to hold the hole in place and maintain the shape of the clothing.
- Push the needle through the edge of the hole to create a strong anchor. Begin sewing straight up and down in rows, using a running stitch.
- Now, do the same thing left to right, creating your own weave. Once you’ve sufficiently covered the hole, tie it off.
It’s great to mend your old favorites, but we get it—darning knitwear is tough, especially with bigger holes. If it’s too far gone, recycle it and find a gorgeous preloved sweater on ThredUp. Use our detailed search filters to sort by material and color to find the perfect match.
5. Try visible mending
Materials: Embroidery supplies and patches.
Add personality and flair as you mend your clothing. Visible mending is a trend that draws attention to repairs through colorful embroidery and premade patches. Here’s how to do the embroidery technique:
- Choose bright embroidery thread that contrasts your garment. For example, use green for a torn white blouse or pink for ripped jeans.
- Proceed to mend the garment, whether you’re darning knit socks or sewing a small tear. Make sure you aren’t subtle here—use big stitches, sew in X or star patterns, or simply weave a big, square patch into the surface of the garment.
- Tie off the thread. For extra vibrancy, tie off the thread partway through and finish the project with a different color.
Visible mending helps you express your authentic self while openly celebrating sustainable practices. Interested in trying the patch technique? Check out our complete guide.
Build a sustainable wardrobe with ThredUp
ThredUp is the best place to refresh and restock your closet. Mend what you can, and replace anything beyond repair by thrifting high-quality secondhand fashion.
We have affordable, sustainable clothing in every shape, size, and color. You can rely on our Improved Search feature to find the exact piece you need. It uses natural language, so you can type real phrases like “cozy powder blue cardigan for spring days” and get relevant results instantly.
Have any high-quality yet damaged clothes? We love keeping flawed gems in circulation! Order a Clean Out Bag, fill it up, and sell your clothes to us. At ThredUp, we make sure top-notch items stay out of landfills, regardless of small holes or missing buttons.
{{inline-banner}}


Share on Social


Connect With Us
%2520(1).jpeg)

.jpg)






.jpg)
.jpg)

.jpg)